
Gluing and Laminating Wood with Epoxy
Continuing our Epoxy 101 series, this month we’re looking at just what makes wood and epoxy such an effective and practical pair. (Make sure to read part 1 first, “Three Essential Rules of Epoxy,”) Quick recap of those 3 rules:
- Keep it off you
- It takes two to Tango
- Get it out of the Cup
(Honorable mention: Go to the Bathroom Before you Mix Epoxy)
With those foundational rules understood, I want to talk about some of the ways in which you are likely to use epoxy in your build or repair job, and why.
Wood and Epoxy: A Perfect Match
Epoxy, plywood, fiberglass and solid wood are perfectly matched. (Keep in mind that when I generically refer to Epoxy, I'm almost always referring to the two mixed components, Resin and Hardener, because you always use them together in the correct ratio, mixed thoroughly).
Wood is porous, and therefore readily absorbs epoxy. That natural absorption means that when the epoxy cures (not dries) it is bonded into the wood, not simply sitting on the surface. You get a really strong bond this way. We use this to our benefit.
This bond makes possible some really cool things, which is why smartly-used epoxy makes your boat more durable, more affordable to build, and easier to build and maintain.
Gluing and Laminating
This is a two-birds-with-one-stone situation: we can talk about Gluing and Laminating together, as they are for all intents and purposes variations of the same basic process. Gluing comes into play when stitching your boat together, or scarphing up plywood or staves for a mast, bonding a backing plate, etc. Boat builders glue a lot!
Why is epoxy such an effective glue? As I mentioned before, epoxy soaks into wood, particularly the exposed alternating grain of plywood, which is a great start for a solid bond. You will need to add fillers to the epoxy that add strength to the glue joint; Fumed Silica (wear a mask) and Wood Flour are two common additives that add strength to a joint. And epoxy likes a joint with some room in it, which means you don’t need to achieve perfect wood to wood contact in a joint — full contact is not only unnecessary, it can actually present problems.
Gluing: Step-by-Step
1) Start out with a dry run by clamping everything together how you want it to fit.
If you need cauls or blocks screwed to a bench, this is the time to get them in place. Get your clamps ready and at hand. Get your gloves, thinner, rag, personal protective equipment, clean up sticks and everything that you will want at hand. If you wear an apron put that on. With clear packing tape, tape everything that you don't want to be permanently glued to your piece or bench :) and do a test clamping. This is always worth doing in advance, you will either find that you are perfectly ready or you will find that you need more clamps or a better caul or clamp pad etc... you get the idea. Go use the bathroom and get ready to mix.
2) Mix up and remember our essential rule, “It Takes Two to Tango.”
Like every process when using epoxy, you will start with correctly metering out the two components and thoroughly mixing for two minutes or more. Be thorough, get all the "dance partners" paired off, don't leave the quiet kids sitting by the wall. Scrape the sides of the mixing cup, get into the corners of your cup, scrape epoxy off the mixing stick back into the cup and mix. We are aiming for an active stir–short of beating eggs, but with more action than gently folding cake ingredients.
3) Wet Out with your un-thickened epoxy first, followed by your thickened epoxy.
Now you need to wet out both surfaces you are going to glue. Take your mixed epoxy and a disposable brush and apply the un-thickened epoxy to both surfaces. Let that soak in for a few minutes and check back. If it has soaked in you should apply more… you will know if it's soaked in because the surface will look dull and dry. But if it still looks wet and glossy, you can then take your cup and add in your filler to the mix.
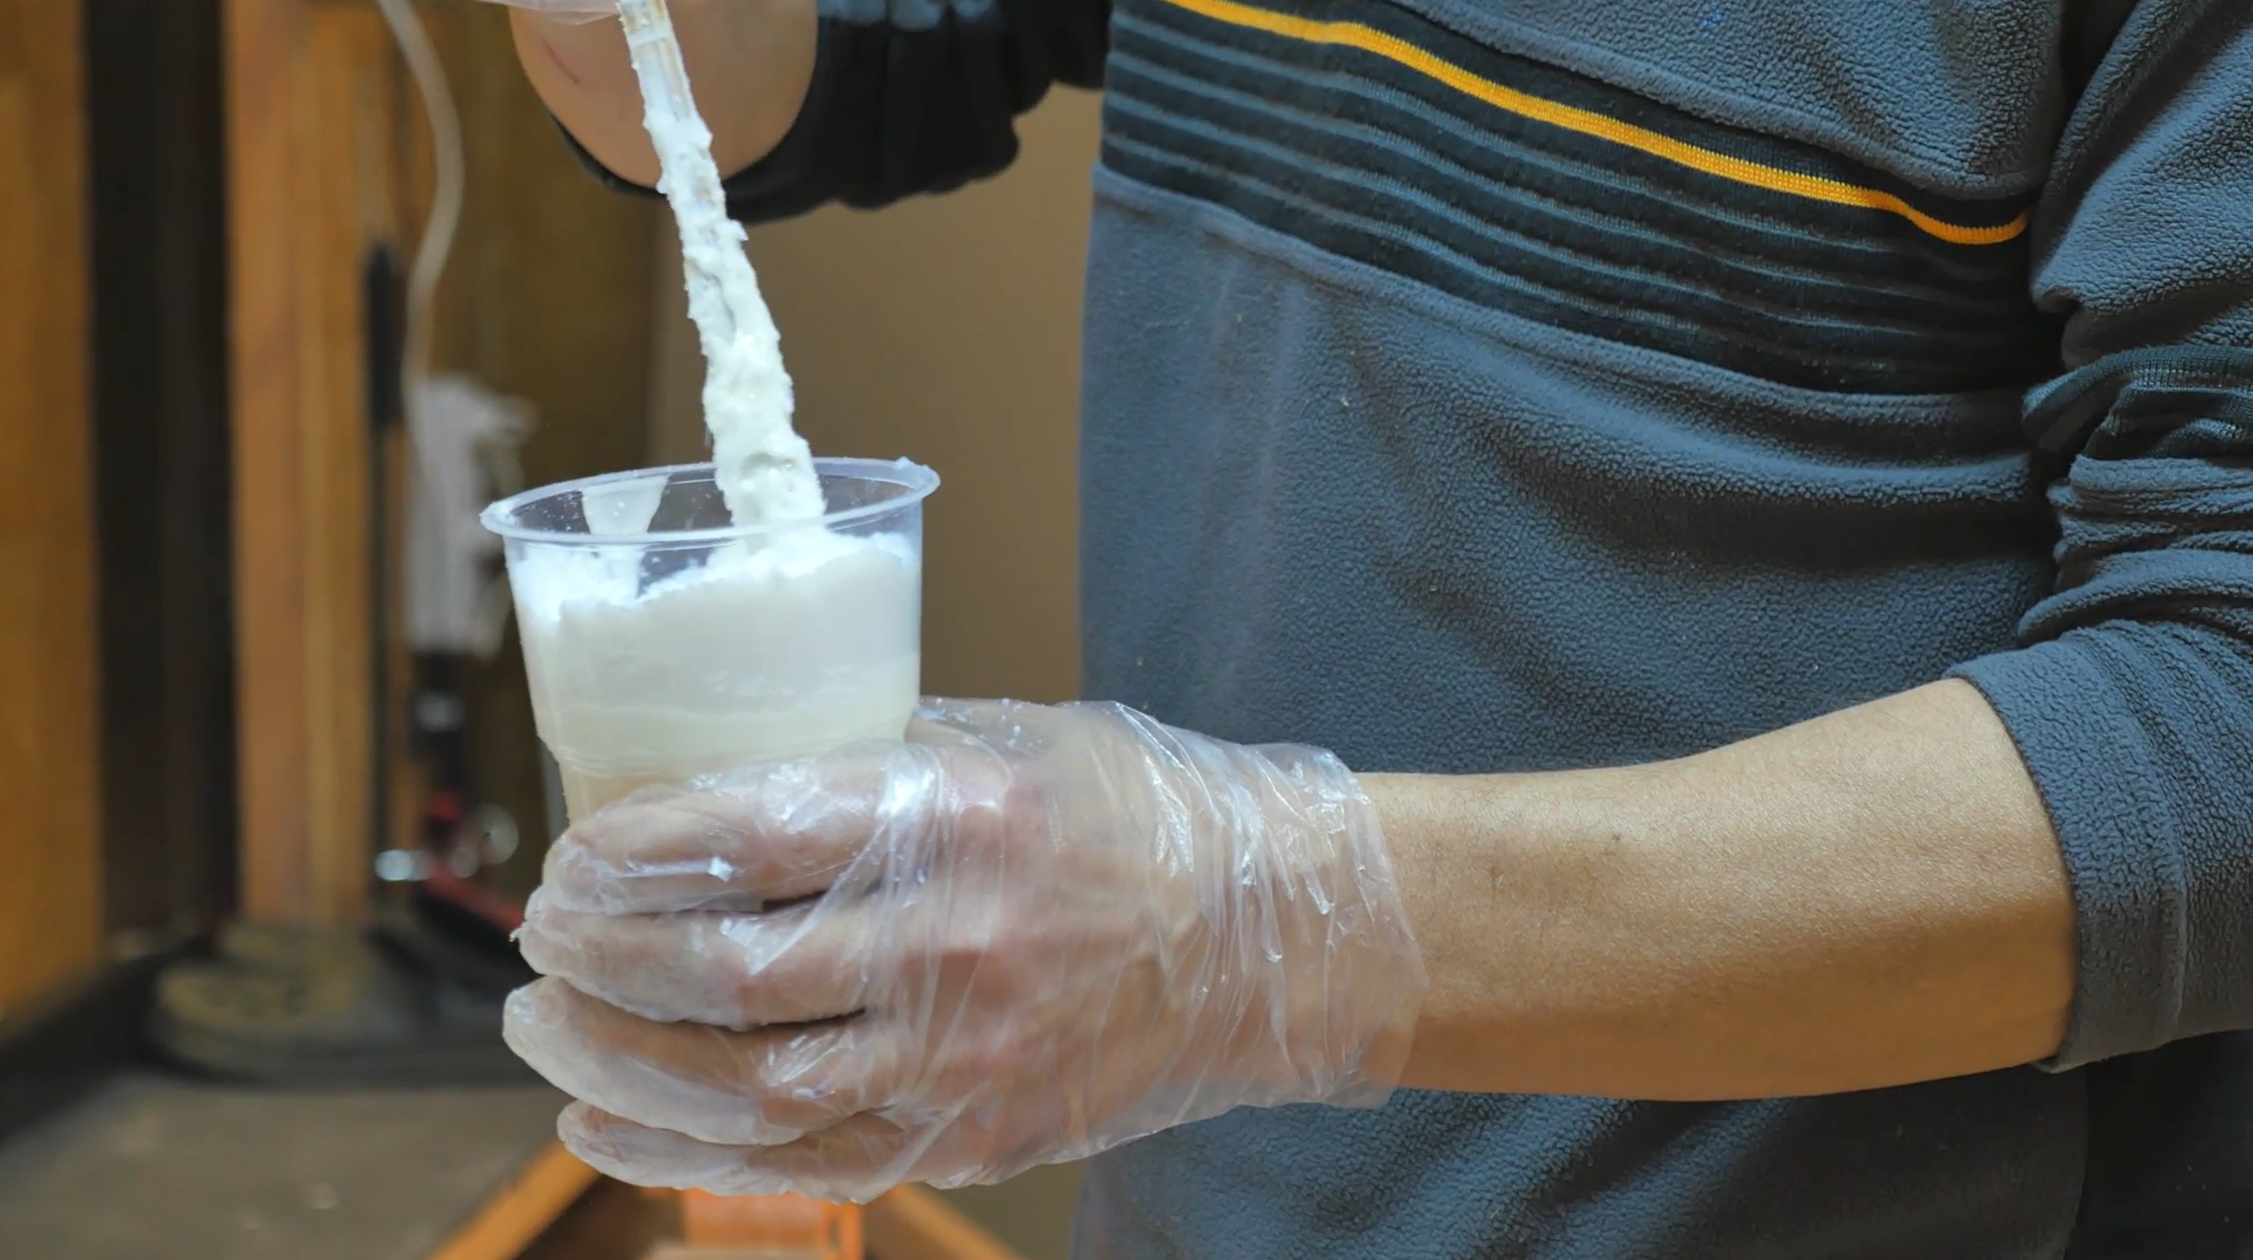 Thickening epoxy with silica.
Pro tip: if you're using System 3 Silvertip, wet it out just as described above, but instead of then thickening your mix, use the Silvertip GelMagic Tubes that mix in the tip. It's prethickened and mixes right in the tip, super easy and reliable.
Now, About Filler & Thickening…If you have big voids to fill in your glue up, mix it thick like cake icing. But if you have a nice fitting joint mix it thinner, more like mayonnaise or honey, either way you want the filler to be completely mixed in and smooth, there isn't a specific amount of time needed. You need to mix thoroughly and always mix filler into a batch of epoxy that has already been properly metered and fully mixed, never mix filler in until after you’ve completely mixed Resin and Hardener.Apply the mix to one side of the joint – you can apply to both if you want, but it's not necessary in most instances. The goal is to have that thickened epoxy covering the entire surface with a coating thick enough that any variation in the joint is fully filled with epoxy when you clamp the joint together. (An instance where I would apply thickened mix to both sides of a joint: if when pressing the joint together, the thickened mix is likely to be scraped out like assembling a puzzle joint, or inserting a plug into a tight fitting void). |
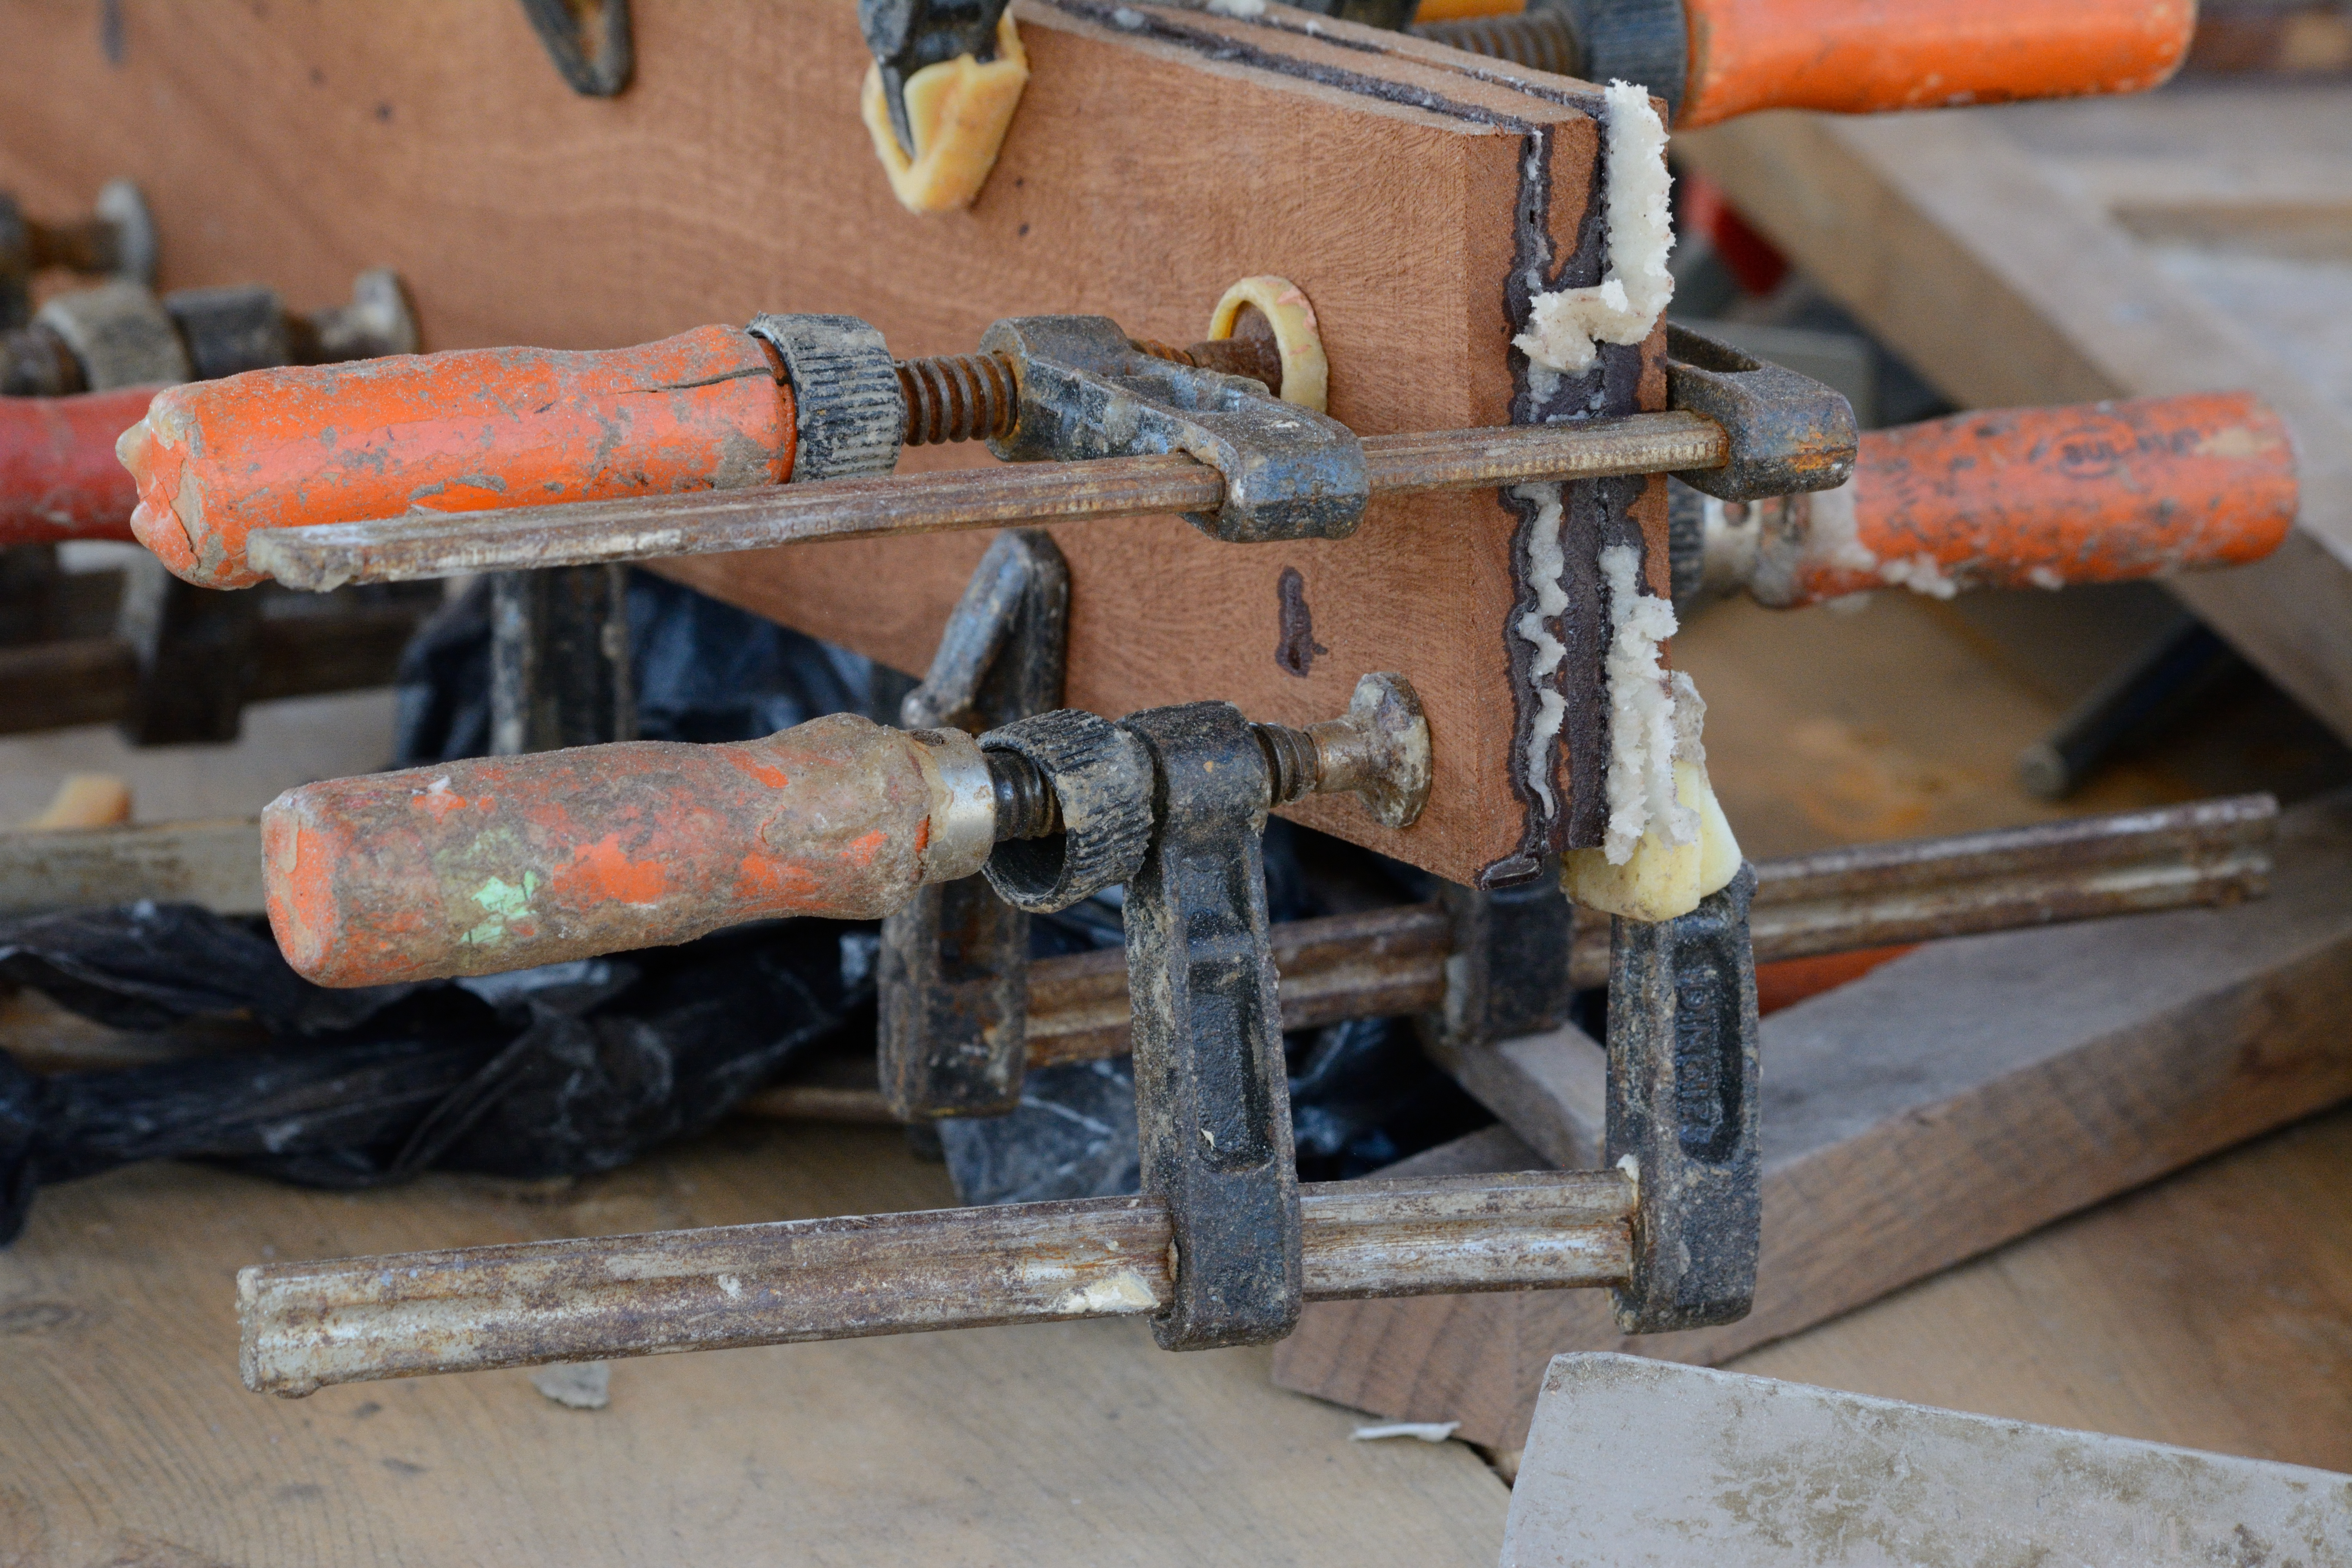
4) Clamp it down (but not too much).
Once clamped, you want to see your thickened epoxy squeeze out everywhere. If you don't, it more than likely means that you need to add more thickened mix, unclamp and add more everywhere, then re-clamp. You also have to keep in mind that it is essential to not over-clamp. You actually want that thickened mix to remain in the joint, that is what gives an epoxy joint strength. Unlike gluing with Resorcinol, Titebond or Gorilla Glue where it is critical that the joint is tight and that you have wood to wood contact, it is actually better to have room for epoxy in the joint, so don't squeeze it all out. Just squeeze enough to see a decent-sized squish come out and a nice looking joint, but don't go as far as you possibly can.
5) Tidy up the excess.
Now is the time to get your clean up stick. Time spent cleaning up now when the epoxy is liquid and easy to clean up will save you a lot of time and headache cleaning up cured epoxy with filler. So with the mantra "I want epoxy in the joint" in your mind, clean up every bit of excess you can, but leave the epoxy in the joint alone.
Start off with bulk removal with a stick, it can be handy to have one end kinda pointy and the other more like a chisel. Scrape off excess and dispose into a cup or if you're clever you can plan it out to have multiple glue ups and use that squeeze out for the thickened epoxy on the next joint (at some point you won't be able to re-use, but you can usually get away with once or twice).
Then take your denatured alcohol and wet your rag, not dripping wet, but moist enough to be effective and wipe up where there is epoxy left behind. Pay attention to your clamps, you don’t want epoxy building up on them. If you're like me, you will want to re-use your clean up sticks, so clean them too and set them aside. Put your cup with extra epoxy on something non-flammable, and if it's a large volume get it outside. Depending on your conditions you may be able to unclamp tomorrow!
Lamination… the Same Only Different
Laminating is an awesome way to pair wood and epoxy to create long lasting, strong and efficient parts for your boat. The manner in which you handle the application of epoxy to a laminated job is the same as described above for gluing: wet out everything, with the exception of the two outside faces of the part, wait a few minutes and add more un-thickened epoxy. If you see dry spots, then mix Silica or Wood flour in to add strength then coat one face of each lamination and clamp to your form. Clean up is the same too.
Why Laminate?
I think the most compelling reason to laminate is that you can create most any shape you want with no grain run-out. Stems, frames, knees, skegs, all sorts of curvy bits. Take your simple tiller with an elegant curve to it. If the curve isn't too severe you can get away with simply sawing it out of a board, particularly if the board has some sweep to it. But no matter what, you will have some level of grain run out, which weakens the tiller.
However, with laminating you can create the exact curve you want, you can even add in different species of wood if you want. There is no grain run-out and it's stable and strong. An improvement if you ask me!
Striking a balance between flexibility and strength
There is a bit of a balance to sizing your laminations. Your goal will be to cut your laminations about as thick as will take the bend without great effort to pull them into shape. The sharper the bend, the thinner the pieces. The more subtle the bend, the thicker the pieces.
Keep in mind that for every lamination you are losing at least the thickness of your sawblade, more if you put them all through the thickness planer prior to assembling. You can see how finding a lamination that is thick enough to avoid unnecessary wastefulness, while not being so thick that you will have a difficult time pulling them into shape (and a correspondingly high amount of "spring-back" when you take the lamination out of the mold) can take some experimentation.
Spring-back is the amount your cured piece moves when taken out of the mold. We want to avoid this as much as possible. Another factor in reducing spring-back is the amount of time you leave the glued-up clamped up in the mold. I always leave laminations clamped up longer than say a scarph joint or other simple glue-up. A long weekend clamped up is a good rule of thumb.
Laminating creates possibilities that you might not otherwise have
Laminating is commonly used when creating pieces with a bend, but that's not the only reason to laminate. A common place to take advantage of the benefits of smaller pieces of wood glued together is the keel. Depending on where you are in the world, it's likely that a large timber suitable to be the keel of your boat is not attainable. This is a perfect spot for laminating. You can use smaller pieces to create a large timber. It will be more stable, again smaller pieces shrink/swell less, stiff and strong and attainable. Lamination lets you use the materials that are available to you, where you are.
Shop Epoxy Kits:
|
Not what you're looking for? Browse the Epoxy Department |
Recent Posts
-

Bestselling Boat Plan Designers of 2024
Fun fact: In 2024, you all collectively purchased over 2,500 boat plans from Duckworks! (That's 20 …Jan 25th 2025 -

A New Chapter in Duckworks History
Hi everyone, Katie here to give you an update on what's happening behind the scenes here at Duckwork …Sep 24th 2024 -

Designer Spotlight: Frank Smoot
How I went from not knowing squat about boats (or sailing) -- to designing a little trimaran I can’ …Aug 28th 2024