Note: These plans consist of a booklet of 40 pages of text, drawings and photos on 8.5" x 11" pages. The printed version is black and white. The PDF file for instant download has color photographs. To save $5 and postage costs choose the download option by ordering from this page. For printed plans, click HERE
*****
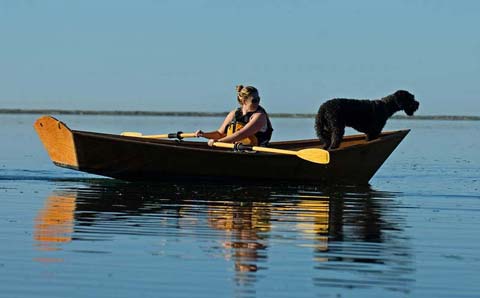
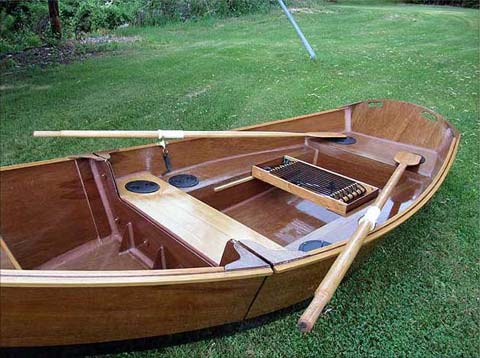
a drift boat with take-apart option
Aside from the take-apart option, this design is somewhat different from traditional drift boats. The wider transom and fuller bottom panel are designed to provide added stability to this compact lightweight design, and the plans include discussion of a number of options to customize according to how you plan to use the boat.
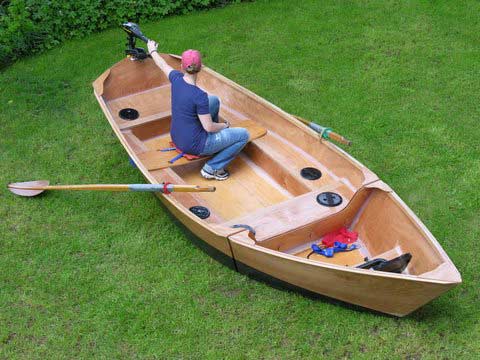
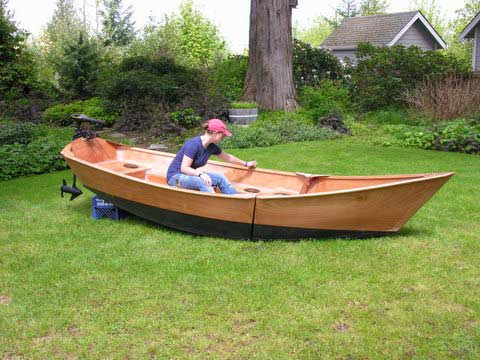
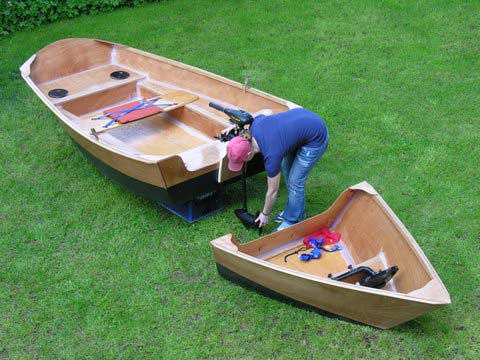
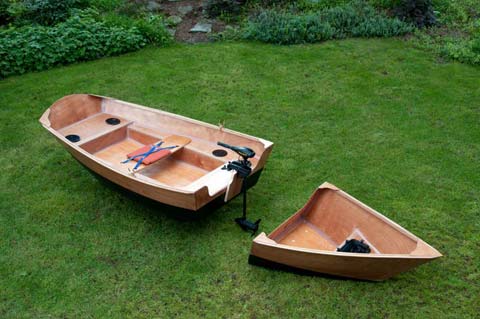
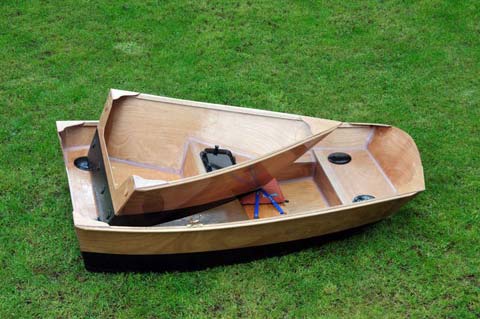
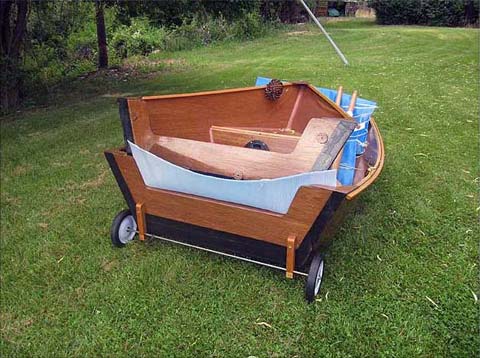
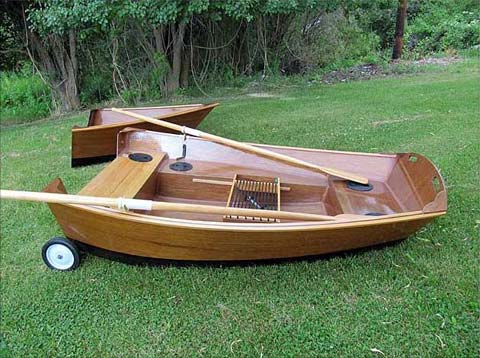
While the 2-part option can be useful and interesting, most versions of the boat will be built as the original one-piece 14 foot hull, and the 2-part option can also be done as a retrofit if it still sounds like a good idea later on. Using ply/epoxy techniques makes modifications like this easier than traditional wood boat construction, particularly for amateurs and first-timers, and requires a minimum of simple hand tools. The nested sections unbolt in minutes and can be hauled even in compact truck beds or car-topped. The aft section disconnected becomes a 9 foot pram equipped with adjustable seating and with the wide transom to provide extra stability for recreation or use with a motor.
Installing or adding useful modifications like waterproof bulkheads and decks provides dry secure storage, interior furniture and safety as emergency flotation. Using compartmentalization as structural support the boat can be built ribless, further simplifying construction and producing a more appealing and comfortable interior easier to keep clean and maintain.
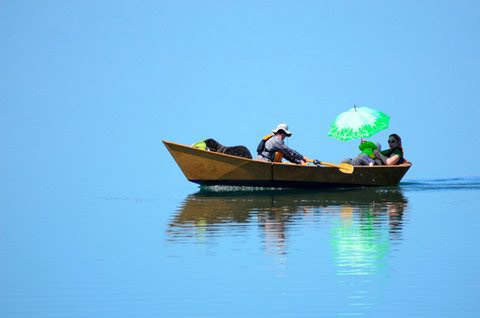
The slightly detuned drift dory can be equipped for moderate whitewater and also makes a safe family recreational craft, and lightweight versions can even be cartopped to eliminate the legal and storage hassles of a trailer. Lightweights do carry more payload, but the real pleasure of a lightweight boat is realized mostly with the convenience of getting the boat to and from the water and in and out of the water. The option to build a standard lightweight or even an ultra-light version with the use of glass sheathing, taping and graphite hull reinforcements are all relatively easy to accomplish. And while the boat can be built using traditional methods or even a combination of materials and techniques, hardwood ply and epoxy is the nonpareil choice for lightweight versions.
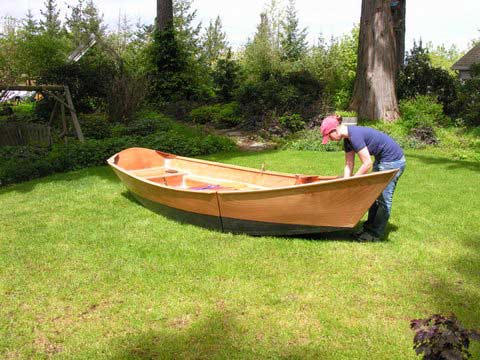
Lightweight versions can weigh less than 135 pounds and are surprisingly durable, and the smallest of transom mounted trolling motors will push the hull. Lightweight versions with the optional graphite bottoms can be dragged with a tether over parking lots, down launch ramps and across gravel beaches, and the wear only makes them slicker. Not having to lift the boat off the ground has other unexpected benefits, as when loading or unloading you only have to lift half the hull at one time to prop it up on the racks, then slide it forward. At the campsite prop the hull up on its side for a windbreak or flip it upside down on logs for a picnic table or sleeping shelter.

Scheduled to publish in Outdoor Life magazine, the 30 page building plans are written for amateur builders, with sketches and photos, sources, step-by-step and discussion of options.
**********
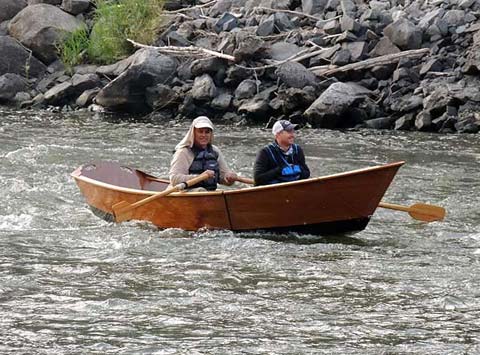
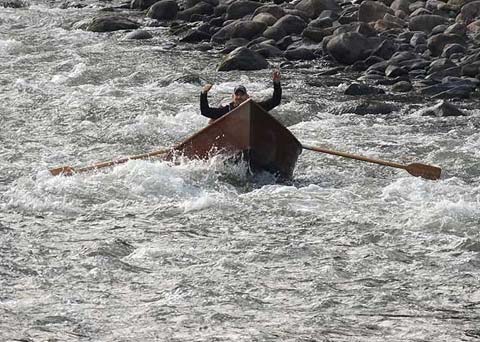
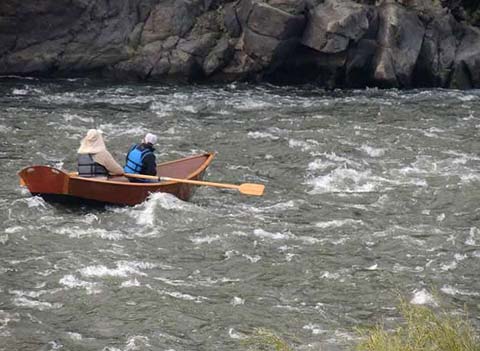
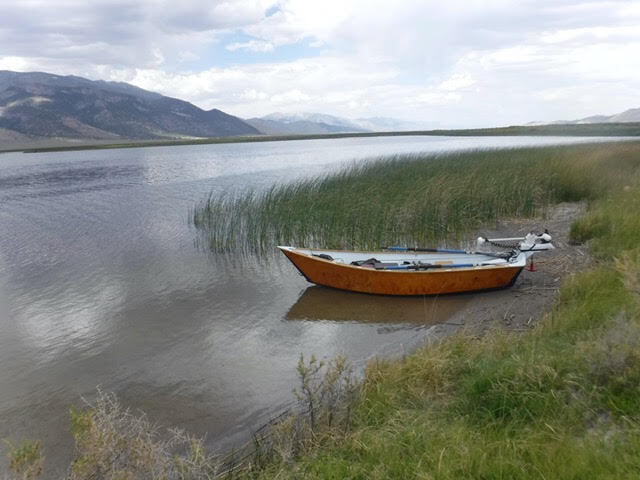
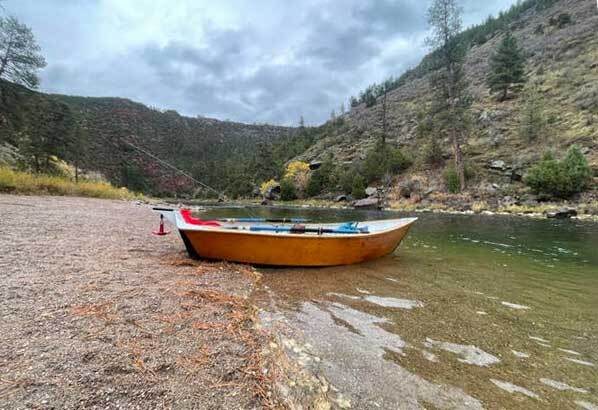
Builder Comments and Photos
Paul,
here are some photos of your Rock Creek Drifter in the water.
Don
**********
“Super easy build, make sure to stain the topside halves before gluing together!Boat works great solo, or, w/ a friend aboard. I’ve done multiple camping trips down the Green Rvr/ Flaming Gorge in Utah. Hauled all gear with ease. I mounted a “Davit” on the stern to mount an anchor and removable trolling motor for use on lakes. Extremely glad I built the boat!Thank you for such straight forward and easy to understand plans.JP”
**********

Paul...my RCD is a one-piece hull and I built a small deck up forward so I can sleep dry in the boat even in the rain and I have rigged a small boom tent if I want more space for cooking. I do a lot of wildlife photography and the boat is good for camp-cruising. I built the lightweight version but I used 6 inch wide glass tape on the chines and reinforced the transom for one of my small motors and added a special compartment aft to isolate my fuel tanks, depending on how long a trip I plan. I can haul the boat atop my little Toyota truck and this spring I'm taking it to Haines Alaska and maybe into Glacier Bay and I hope to send you pictures of the boat alongside an iceberg. I liked the plans but it took me awhile to figure out how to make a nice epoxy fillet without having to sand them, like you suggested. Once I got up to speed on that everything worked. I painted the hull because the plywood I used didn't have that nice grain but it still looks pretty good.
Eldridge M. Idaho
**********
Paul: I have finally completed the boat and I am anxious to launch the maiden voyage! I learned some tricks along the way that would enable me to build a better looking boat if I could build another one right now. (I would do that, but I built it in my nephew's garage. I doubt he would be pleased if I took up his garage space again so soon!) I told several people that I was impressed with your design and the longer I worked on the boat the more impressed I became with the elegance of your design.
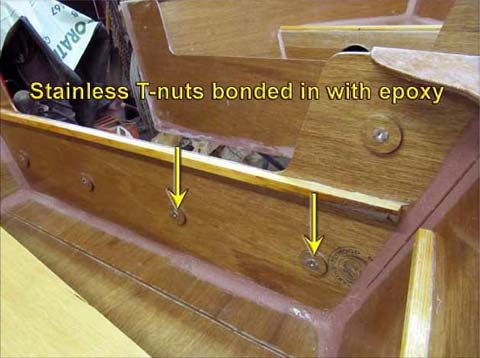
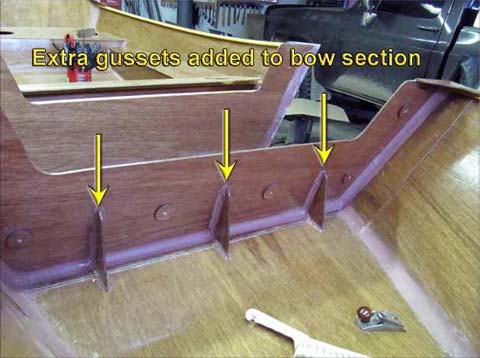
One thing that helped me make better fillets was the use of disposable pastry bags. I found them on Amazon.com in a roll of 100 triangular shaped bags. You just snip off the corner at the appropriate point to produce the correct diameter bead of epoxy. It helps you get the filler deep into the joints. And it may not have been necessary, but I reinforced the main bulkhead in the bow section with three gussets. I also bonded stainless steel T-nuts to the aft main bulkhead to make attaching and removing the bow section easier. I also added a removable set of wheels to make the process of getting to and from the water easier.
Thank you for your support! And as I get some decent photos of it in the water, I will share them with you.
Don
**********
The kids love exploring the back bay and all the marinas and islands here in Newport Harbor and sometimes I take it out the jetty into the ocean and just row around. I cartop it down from Santa Ana and launch it by myself behind a restaurant in the marina parking lot. I beefed it up in places and it weighs just under 150 pounds but I added some compartments and furniture inside the boat. I installed the bulkhead but we could never bring ourselves to actually cut the boat in 2 pieces.
Michael N. California
**********
I added a little more rocker to the bottom like we discussed by email because I do use it mostly for drifting but I mostly like the wider transom for the extra space inside the boat. We think its just about the perfect boat for steelhead fishing for the boy and myself. This summer on my vacation we're doing a cross country trip and I'm taking the boat.
Larry Christianson, Oregon
**********
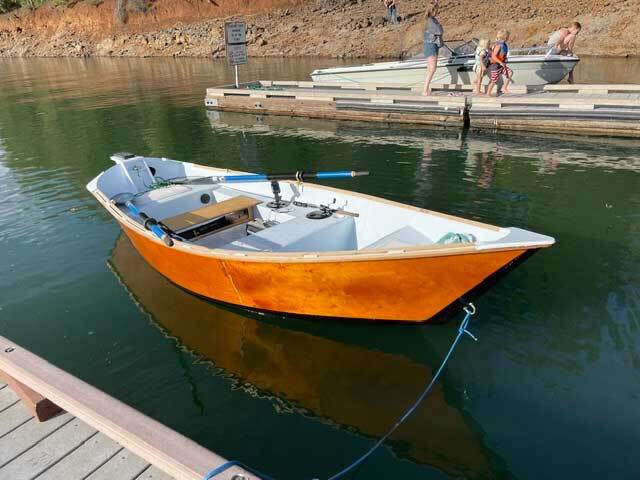
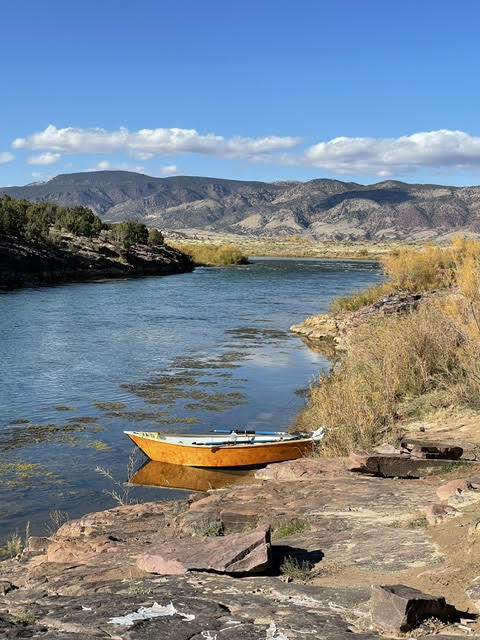
More Photos