

Free plans. To download the file, click HERE
This is a design of my own planning. It came about after I had built a couple of the One Man Dinghies which although a great design they were slow to build and I have come to dislike working with fiberglass tape and epoxy. This was first conceived as a father son project. My son at the time was very much into computer games and it was difficult to pry him away from the machine. Also with computers he was used to having projects move very quickly. Boat building of a traditional boat was just too slow to interest him. I have assembled this design in 4 hours and have built the complete boat in 8 hours. I am posting the plans for this project for free.
Thanks - Herb McLeod
Addendum - My son who I found difficult to pry away from the computer now has a PhD in physics and is working in Grenoble France. He is also an avid white water kayaker.
Instructions:
Building the One Sheet Skiff
Materials:
1) One sheet 4x8 1/4" plywood
2) 2"x4" -16" scrap for stem (make the stem long and trim it to size after you have attached the sides and gunwales)
3) 1"x2" - eight 8' for frame, transom, chines and gunwales and full-length skeg
4) 2"x2" - two 6" these are mounted on the outside of the gunwale and with an appropriate sized hole through them hold the oar horns. (see the picture of the gray OSS)
5) Glue; tube of polyurethane construction adhesive (PL premium), plastic resin glue (Weldwood) or epoxy
6) Screws and/or nails plus washers and screws (where needed to attach chines and gunwales)
7) Scrap 1'x4' 1/4 ply for seat
8) 1'x 4'x 1 1/2 " bead board (closed cell plastic foam insulation board) for under seat for flotation
9) Latex primer and paint
10) Oarlocks
Assembly:
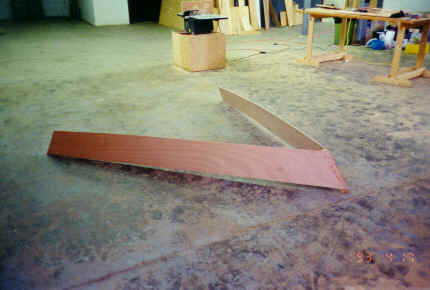
1) Cut 9" strip off each side of he sheet of plywood for sides
2) Make stem cut bevels at 33 degrees
3) Attach sides to stem:
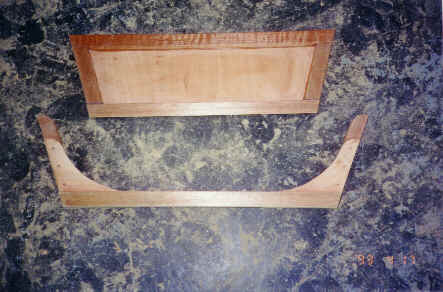
4) Build transom and frame: (you will round off the top of the transom after you have attached the sides and gunwales)
5) Attach sides to frame and transom:
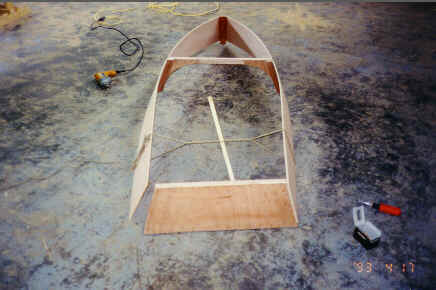
Test fitting first is a good plan:
6) Cut 1x2 as shown on drawings and install chine logs. (If you have splitting problems thin them down an eighth of an inch.) Use washers on your screws on the ends and at the main frame to stop splitting as this is about as much of a bend as you can make in a stick of wood without steaming it.
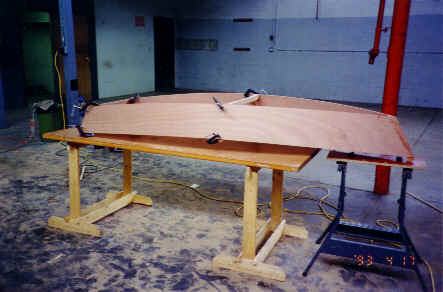
7) Attach bottom and trim.
8) Shape and attach gunwales. Use washers on your screws on the ends and at the main frame to stop splitting. Now you and round off the top of the gunwales. Now glue and screw the 6" 2x2 blocks to the gunwales for later attachment of your oarlocks. These blocks should be attached so that the centre of the oar pin will be 20 to 22 inches forward of the transom.
9) Attach a 1x2 lengthwise to outside of the bottom to make as a shallow skeg or attach a deeper fin type skeg as drawn on the plans. Both types of skegs seem to work equally well but the 1x2 full-length skeg allows one to place screws through the plywood and bead board seat to hold it to the bottom.
9) Cut bead board and paint two coats of latex primer on all sides let dry. This will stop it from melting if it comes in contact with oil or gasoline. Next glue the bead board to bottom on inside of your hull. Then cover the bead board with the 1/4-inch plywood seat and screw through the seat and bead board into the bottom and the skeg to attach.
10) Make oars as drawn.
11) Paint everything (bright colours are great).
12) Fasten hardware (oarlocks) and go boating:

Feedback:
A little boat my brother and I built , this one was actually based on a plan, from Herb McLeod, the OSS (one sheet skiff). This boat is made from only one sheet of 1/4 plywood and about 5 eight foot long 1x2's. The materials total about $20. It is surprisingly stable with only one person, I built one for myself after this and mounted oars and used it for fishing, and I've built a couple more since then but they're sold now.


