Description
Note: you will also need the plans in order to build this boat.
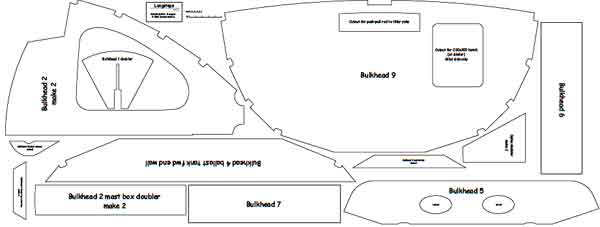
Thanks to our friend Joel Bergen, we are now able to offer full size patterns for bulkheads, stems and other parts for Navigator. These come in two basic formats. The first is a series of sheets that come off a roll printer 36" wide. Navigator has three sheets up to 8 feet long. Following is an example of how the various patterns are nested on the sheet.

Notes: These files are available only as a set. These files can be taken to any commercial printer with a 36" roll machine and they will be able to produce the templates for you at a reasonable price.
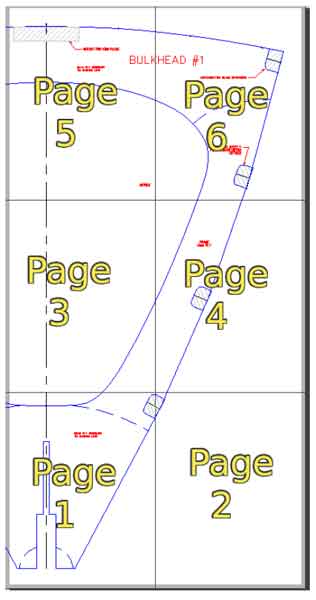
The second Template set is in the form of a "booklet" that you can print at home and easily align into larger sheets using a grid. (see instructions below) We provide several printer options - here is what comes in your download file:

You get to choose whether you want to print the patterns at home or take the roll form files to a commercial print shop.
If would like Duckworks to print the 36" wide roll-form templates and mail the printed sheets to you, click HERE
HOW TO USE THE TEMPLATE KITS
The plans for Navigator are not drawn at full scale. One of the first tasks the builder will need to do is create full sized parts on plywood using the dimensioned drawings. This task can be difficult and time consuming for most builders. These templates will help you.
This kit does not include templates for every part – only those parts that can truly benefit from having templates. In addition, many of the larger parts will have a template for only one side. Simply flip the template over about the center line to draw the opposite side.
To use these templates you will need a computer with a printer, some Letter size (8.5” x 11”) paper, scissors, tape, and a “grid table” (more on that later). Instead of ordinary paper, you may use heavier weight card stock or photo paper to create more robust templates, but ordinary printer/copier paper is adequate if you’re careful not to tear them. Vellum (tracing paper) also works and makes aligning the pages to the grid much easier.
Follow these steps to create your templates
-
Print the desired pages of this document on a laser or inkjet printer. Make sure your printer is set to print at 100% scale. Most are not. See “Printing at full scale” below.
-
Arrange the printed pages accurately using your “grid table”. See “The Grid Table” below.
-
Tape the pages together.
-
Remove the taped template assembly from the table.
-
Cut out the templates with the scissors.
-
Trace around the templates onto your plywood sheets, or glue them to the plywood with spray-on adhesive and cut out the parts.

Printing at full scale
Most printers are set by default to “Fit to printable area”. You must set your printer to print pages to actual size before you print these templates. If you don’t, the templates will be stretched, shrunk, or otherwise distorted. To do this, you will need to turn off all “Fit to printable area”, “Shrink to fit”, or similar settings. Instead, change the settings to Full Scale, 1:1, 100%, or Original Size, depending on the computer and software you are using.
For example, if you are using Microsoft Windows, you would double-click this PDF file. It should open in the Edge browser. Click the Print icon, select your printer, set the number of copies, set the layout to “Portrait”, select the desired pages to print, select “Print on one side”. Then click “More settings”. Set the paper size to “Letter”, and most importantly, select “Actual Size”, not “Fit to printable area”
Test print one of the pages and measure the grid. If it measures 100 mm square you’re good to go. If not, go back and look for more printer settings. On my Linux PC, I had to set it in three different places: Layout Scale = 100%, Page Scaling set to “None”, and Print Scaling set to “None”.
The Grid Table
A “Grid Table” is simply a table with a 100 mm grid drawn on it. Half of a new sheet of plywood works great, especially if it’s light in color. Draw, as accurately as you can, a series of horizontal and vertical lines, spaced precisely 100 mm apart on the table. Use those grid lines, and the matching grid lines on the printed pages, to align the pages nice and straight in both directions. Pin the pages down, and tape them all together. The pages will have a blank border around the edges and they will overlap slightly. You can trim off the border if and where needed.


