
3 Solutions for Amine Blush
What's that foggy, cloudy stuff appearing on your freshly cured epoxy? Learn what it is . . . and how to fix it.
If you’ve worked with epoxy, read articles on working with it, or watched videos of folks working on their boats using epoxy, chances are that you have heard of amine blush. Even if you’re not familiar with the term, you might recognize that cloudy looking stuff that can appear on a freshly-epoxied piece of wood. What the heck is it, why is it important to familiarize yourself with it, what challenges does it present to you, and how can you work with it?
While many things about working with epoxy, fiberglass and carbon fiber may seem like black magic, it’s really not that mysterious once you get over a few hurdles. Amine blush tends to be one of those topics that can scare folks away from using epoxy. But, it’s not really that scary. There are ways to work with it, super simple tools that help eliminate it, and systems that avoid it altogether. Stick with me and you’ll be better prepared for your epoxy project.
What is amine blush?
Amine (pronounced “ay-meen”) blush is a waxy substance that can form on cured epoxy. I’m no chemist, nor have I played one on television, but I have used epoxy a fair bit. So while I have no idea how to scientifically describe what amine blush is, I can tell you from experience that high humidity, cool temperatures and long cure times are the environmental variables that increase the likelihood of amine blush developing during curing. (If you’re thinking that sounds like a recipe for a Pacific Northwest winter… you’re not wrong!) When blush is heavy you can see the opaque waxy surface; when lighter it’s not as visible but you can just feel it on the cured epoxy. Either way, if it’s there it has to go.
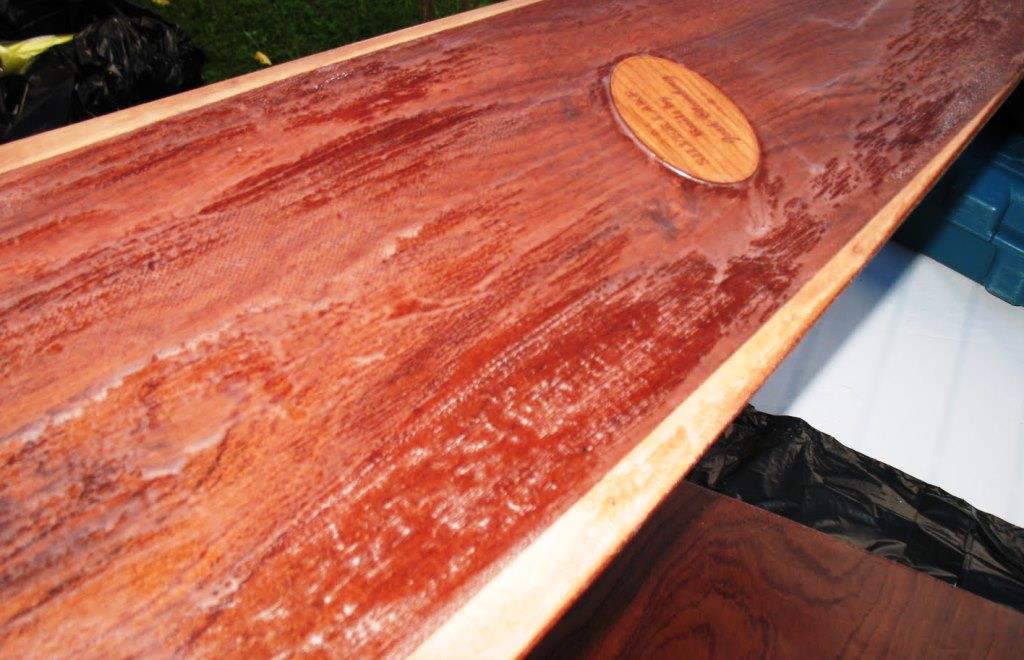
An example of amine blush. Note the cloudy, milky appearance.
Why is amine blush a problem?
If left on the surface, you will have trouble getting just about anything to bond to it. Whether you use epoxy, paint, or varnish, none will stick to an amine blush coated surface. Don’t toss your epoxy in the garbage though, all is not lost! We can work with or work around this problem. Let’s look at a few different solutions.
Solution 1: Elbow Grease
While amine blush is a real problem if left on the surface of your epoxy, the good news is it’s really easy to remove. Amine blush is water soluble. Warm water and a maroon 3M Scotchbrite pad along with a little bit of elbow grease clears it right up. Scrub with the pad and warm water, then rinse it off and you’re good to go.
Pro tips:
- Do not attempt to sand the blush away without water, that just spreads it around and rubs it into the sanding scratches.
- Water is the correct solvent, not denatured alcohol or acetone.
Now, as I have described in previous posts, glassing is a multi-step process. First stick the fiberglass cloth to your part with a coat of epoxy, then fill the weave with a second coat of epoxy, then a third coat tops it off and you’ve got something that can be sanded in prep for paint or varnish. If you have to manually scrub each layer of epoxy to remove the amine blush that job can get real old, real fast.
Hot coating is a favorite time-saving tactic I employ whenever I can. Commonly, hot coating is thought of in the finishing world (e.g. splashing on a few coats of varnish on a sunny day with no sanding in between). Well you can do the same with epoxy. All brands will have a time range when you can get a chemical bond between two coats with no prep in between. This works to eliminate the need to remove blush in between coats too, if you’re quick enough. Wait until the epoxy is no longer tacky, but also not fully cured, then you can apply a second and then a third coat. (This can be a few hours later or the next day, if conditions are right. And for some epoxies you may have up to 72 hours, but I don’t trust that.) Wait for that last coat to cure and then remove the amine blush. A one-time removal is better than three!
So manual scrubbing works, and hot coating can help minimize your number of scrubs, but there are some better solutions out there…
Solution 2: Use Peel Ply
Peel ply is a tightly woven nylon fabric that is coated with a release agent. It feels a bit like light fiberglass, but behaves very differently. Epoxy does not stick to it, at least not in the way that it does to fiberglass and carbon fiber. The beauty of that non-stick property is that you can lay the peel ply over your epoxy-saturated fabric, squeegee out all the air bubbles, and let the epoxy cure. Be sure to leave a little bit of peel ply hanging off the edge of the part you’re working on so that you have a “grabbable” bit of fabric when cured.
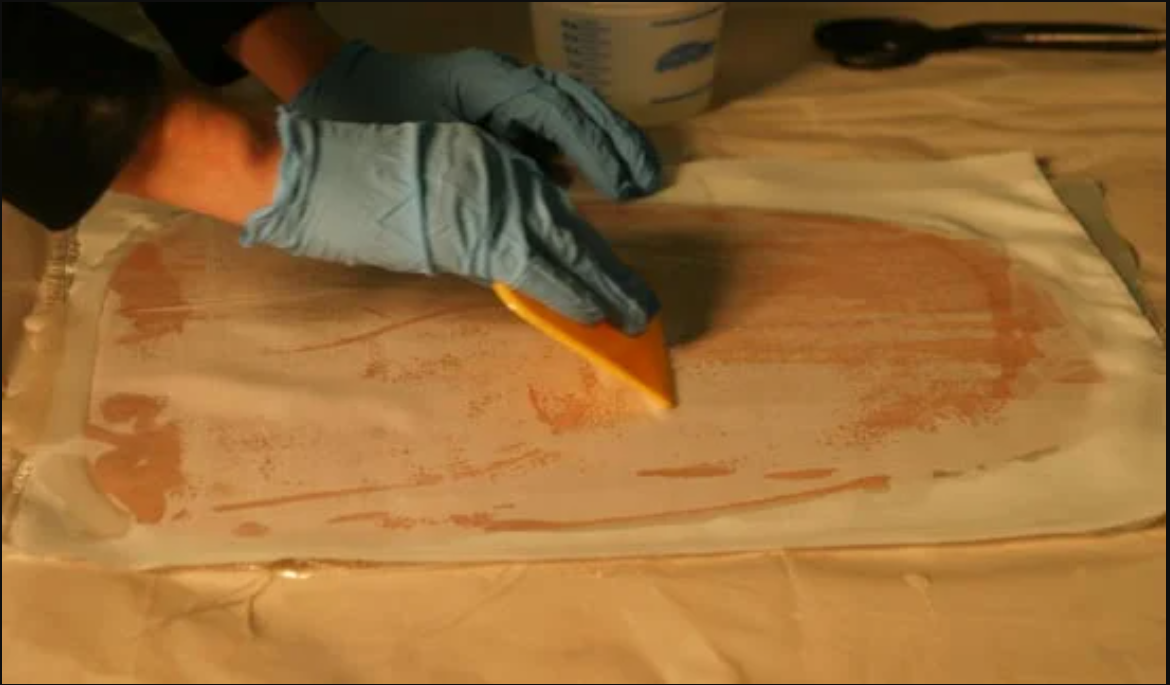
Applying peel ply to wet epoxy
The “voila” part of this show is that when the epoxy cures – drum roll, please–you merely peel the peel ply off, toss it into the trash, and any amine blush goes right along with it. It’s that simple.
That attribute is worth the price of admission alone, but wait… there's more.
The Peel Ply Shortcut:
That three step glassing process we just discussed above in Solution 1? Forgettaboutit. Peel ply is a legit shortcut through these steps and if you do it right, you only have to lay down your epoxy ONE TIME.
With the conventional glassing process, you have to stick down the fabric, fill the fabric, and then coat the fabric for a total of three epoxy passes. When you use peel ply, you’re putting down only one heavy coat of epoxy that fulfills all three steps at once. Lay down your fiberglass or carbon fiber with a moderately heavier epoxy coat than usual, and when peel ply is applied and properly squeegeed down to remove air bubbles, no additional coating step is needed.
The peel ply helps the epoxy stay right where you want it, and it levels it out too. So when you pull the peel ply off, you not only have an amine blush free surface, you also have the three steps of laying out glass complete. The surface should have an even, tight texture to it, with enough epoxy to sand in preparation for paint or varnish.
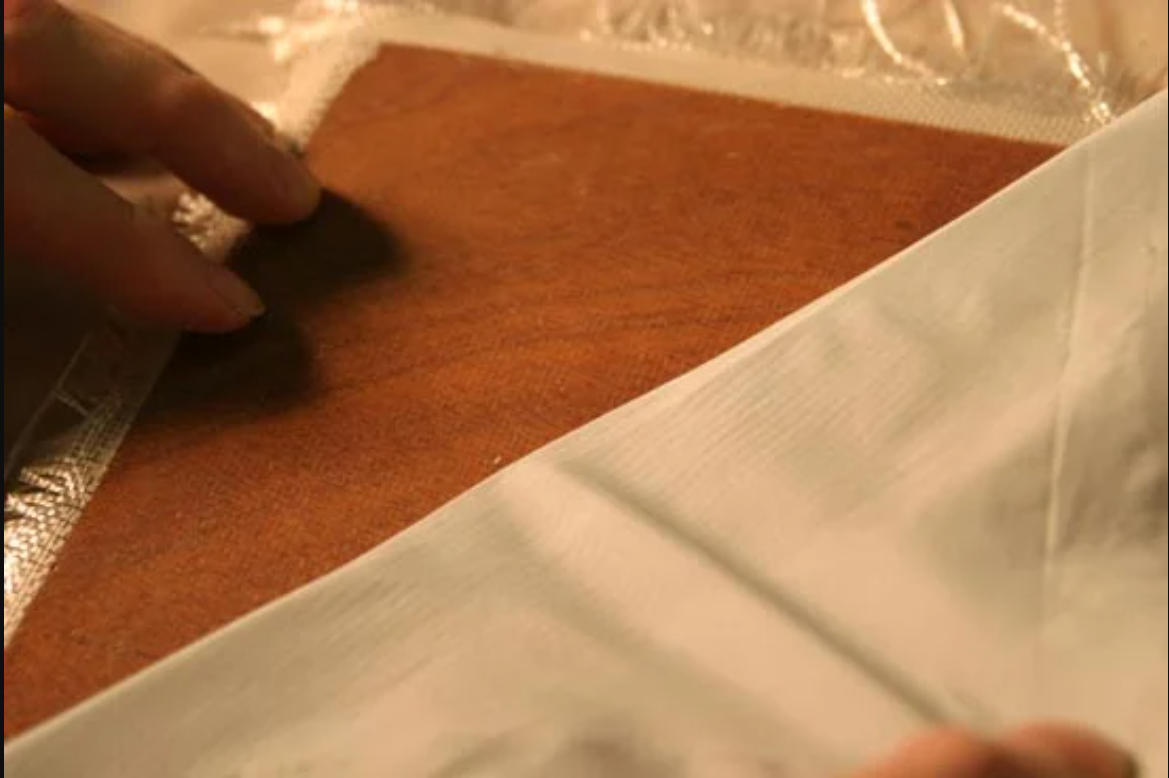
Removing the peel ply from cured epoxy, leaving a nicely leveled and subtly textured surface behind.
There certainly are tips and tricks to working with peel ply. For instance, it is best used on simple shapes. It does not conform to complex contours easily so cutting darts to allow it to follow curves may be necessary. It comes in 50” wide cloth—great for covering larger surfaces and whole sheets of plywood—and 10” wide tape that can be used as is or cut into narrower tape for use on fillets. If you don’t get all the air bubbles out from underneath the peel ply, you are left with cured voids in the cloth, which is awkward and requires more work to fix. But, give peel ply a try. With some practice and experience you are likely to find it an invaluable tool.
Solution 3: Use a Non-blushing Epoxy – Silvertip
Many of you experienced boat builders are probably screaming at your screen by now, because the most obvious way to deal with amine blush is to avoid it altogether–which is possible with the System 3 Silvertip line of products.
Silvertip is the leader in blush-free epoxy for the home builder. They have a comprehensive product line that can help with every step of your epoxy project. You can lay out cloth and tape with Silvertip Resin & Hardener Kits. You can make strong, non-sagging fillets with EZ-Fillet. There is a ready made, super smooth and readily sandable fairing compound Quik-Fair. They even have a pre-thickened product that comes in a caulking tube with a disposable tip that does the mixing for you, GelMagic tubes. These tubes are my go to for “spot welding” when you have a boat stitched together, and I love it for scarph joints and other glue ups. They are convenient, clean and reliable.
Epoxy Brand Comparisons
At Duckworks Boat Builders Supply we sell two brands of epoxy, Raka and System 3 Silvertip. Both have merit and deserve a spot in your shop.
Raka is not blush-free, but it costs less and its hardener comes in slow, medium, and fast formulas so you can have a bit more control over your cure time. Silvertip is blush-free, and accordingly costs more; its hardener comes in either slow or fast. So there are trade-offs, but they both do the job, and you can use either to build a new boat or repair an existing one.
| Raka | System 3 Silvertip | |
| Blush Free | No | Yes |
| Cost | $ | $$ |
| Hardener Speeds | Slow, Medium, Fast | Slow, Fast |
| Ratio (resin:hardener) | 2:1 | 2:1 |
We carry both brands because they both use an easy-to-calculate 2:1 ratio, and both offer great value depending on your priorities. If you’d rather not have to fuss with blush at all it may be worth it to you to spend a bit more for Silvertip. If you’re more concerned with keeping your budget down (especially on a large project), Raka can be a winner.
Regardless of which epoxy you choose, it’s worth giving the peel-ply shortcut a try. It can be a real time saver by saving you extra coats of epoxy. And even though it is in itself a disposable material, it does overall reduce the amount of stuff that goes into the trash, as well as reduce the total amount of epoxy you need for your project.
So there you have it, three methods for dealing with amine blush, plus some additional bonus tips that can make your boat-building life less hassle and more fun. Because isn’t that why we all do this, anyway? :)
Shop our Supplies department for epoxy, fiberglass, carbon fiber, and related supplies now!
—-------------------------
Image Sources:
Big slab is epoxycraft.com
Both peel ply pics are from instructables.com
Recent Posts
-

Bestselling Boat Plan Designers of 2024
Fun fact: In 2024, you all collectively purchased over 2,500 boat plans from Duckworks! (That's 20 …Jan 25th 2025 -

A New Chapter in Duckworks History
Hi everyone, Katie here to give you an update on what's happening behind the scenes here at Duckwork …Sep 24th 2024 -

Designer Spotlight: Frank Smoot
How I went from not knowing squat about boats (or sailing) -- to designing a little trimaran I can’ …Aug 28th 2024